We heard that business has been going well and you are ready to open another set of doors in a new area. Congratulations! Luckily, adding your new café or shop to your existing Odeko account is a quick and painless process - let's walk through it together!
Step 1
Navigate to portal.odeko.com, and login if you are not logged in by default already. Then, select the Settings icon in the top-right corner of your screen.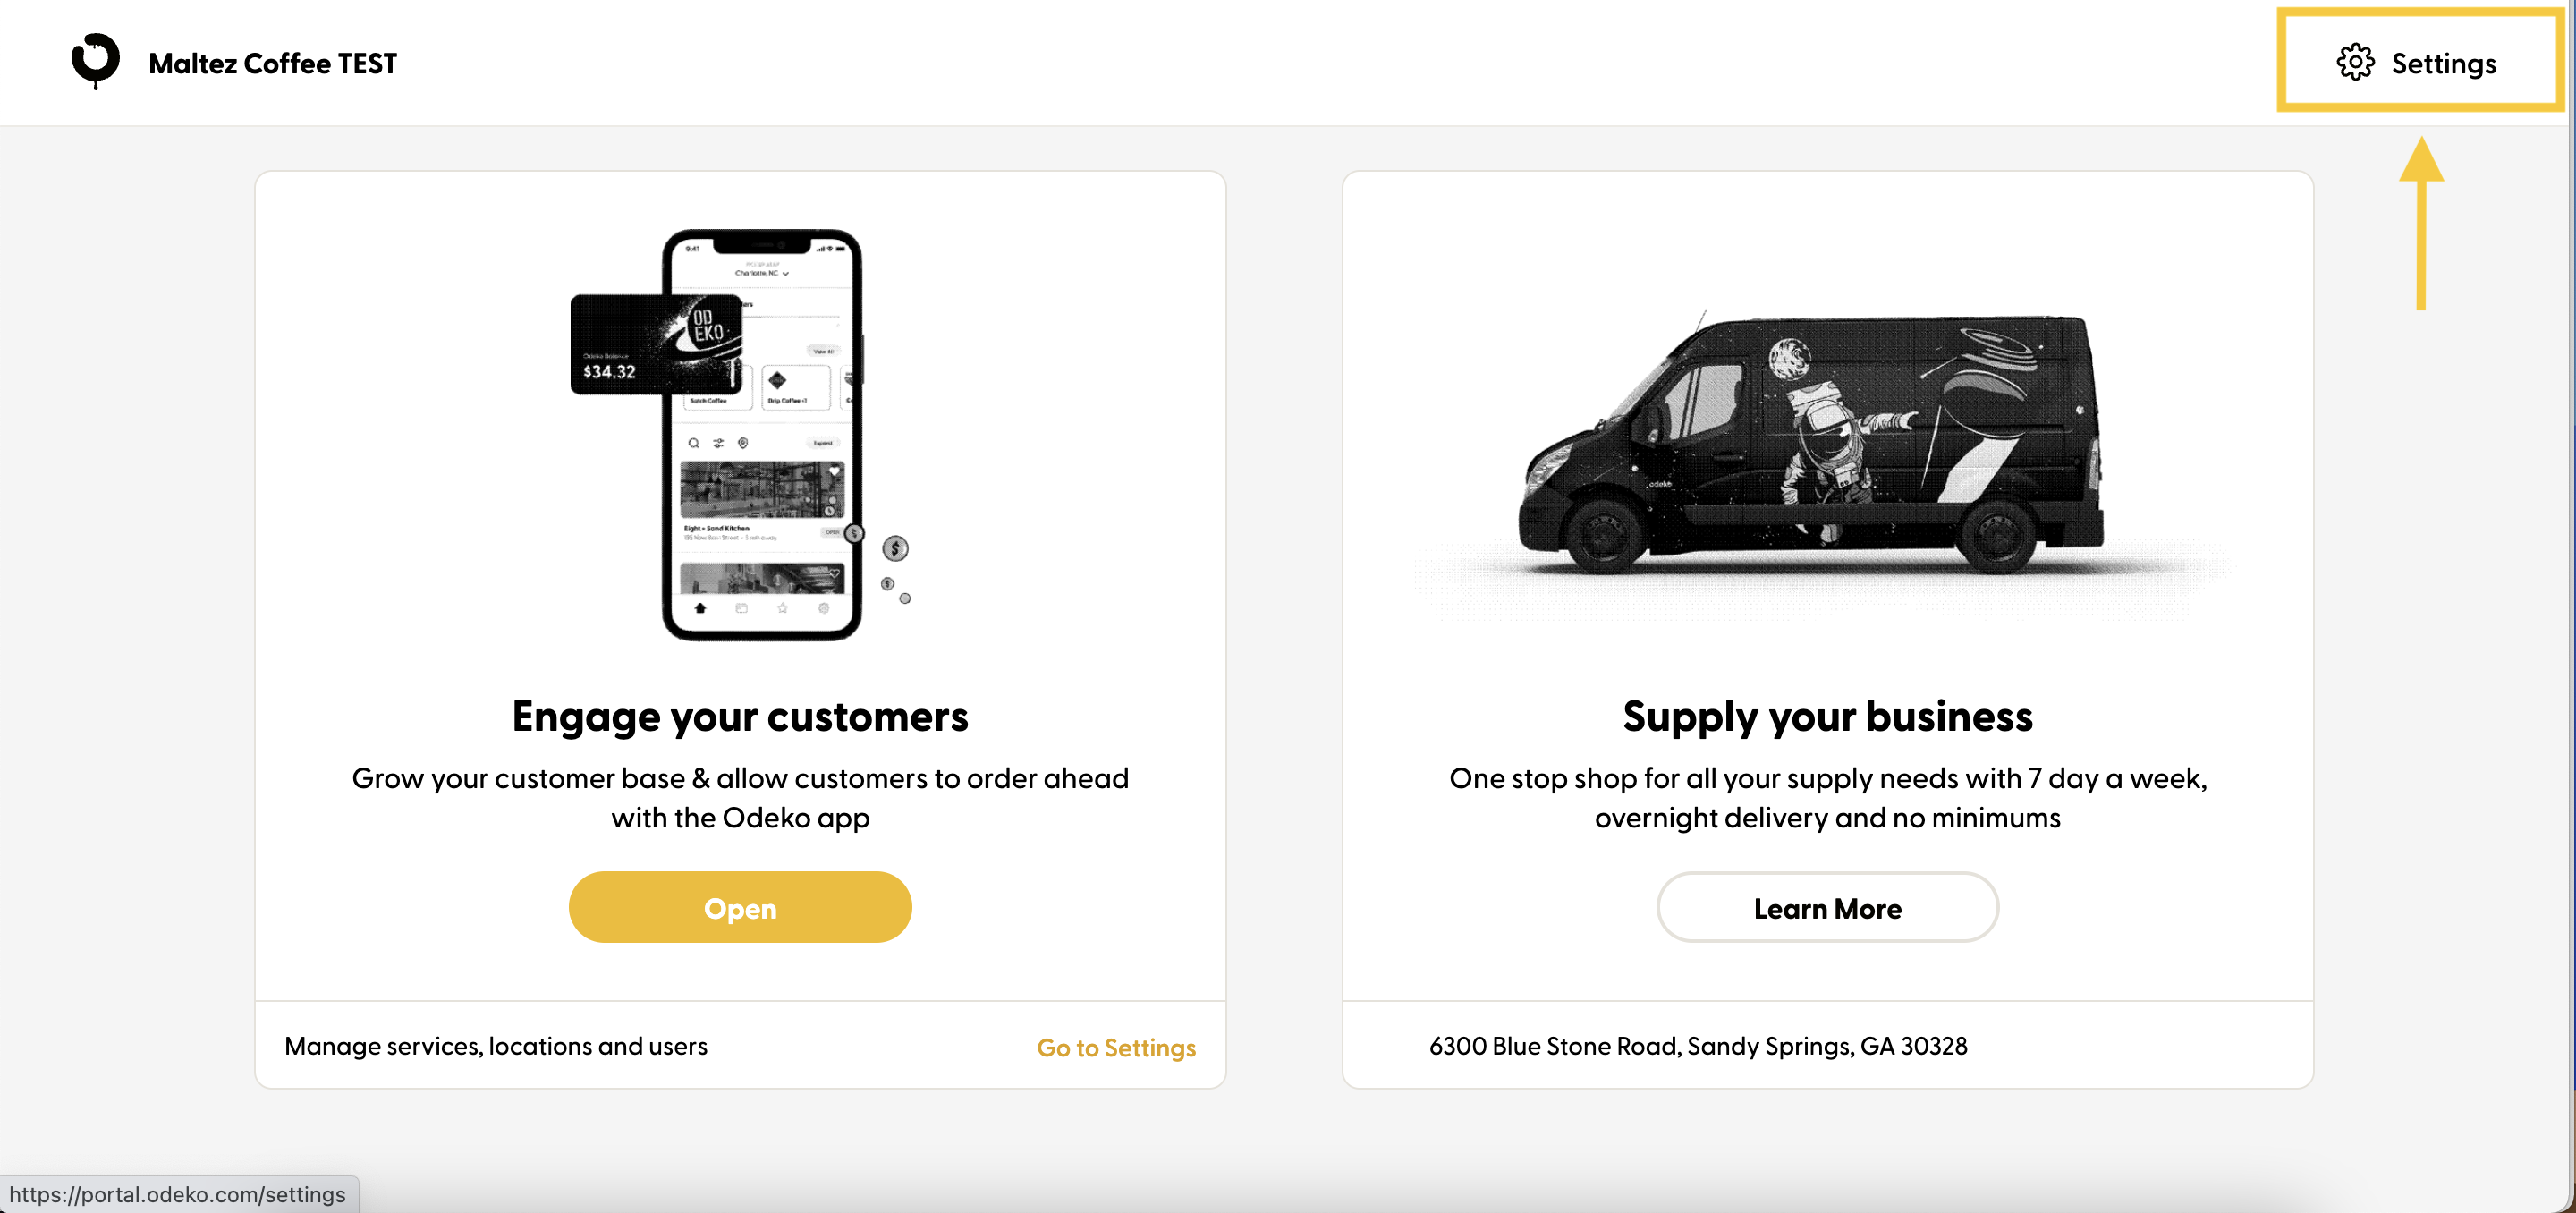
Step 2
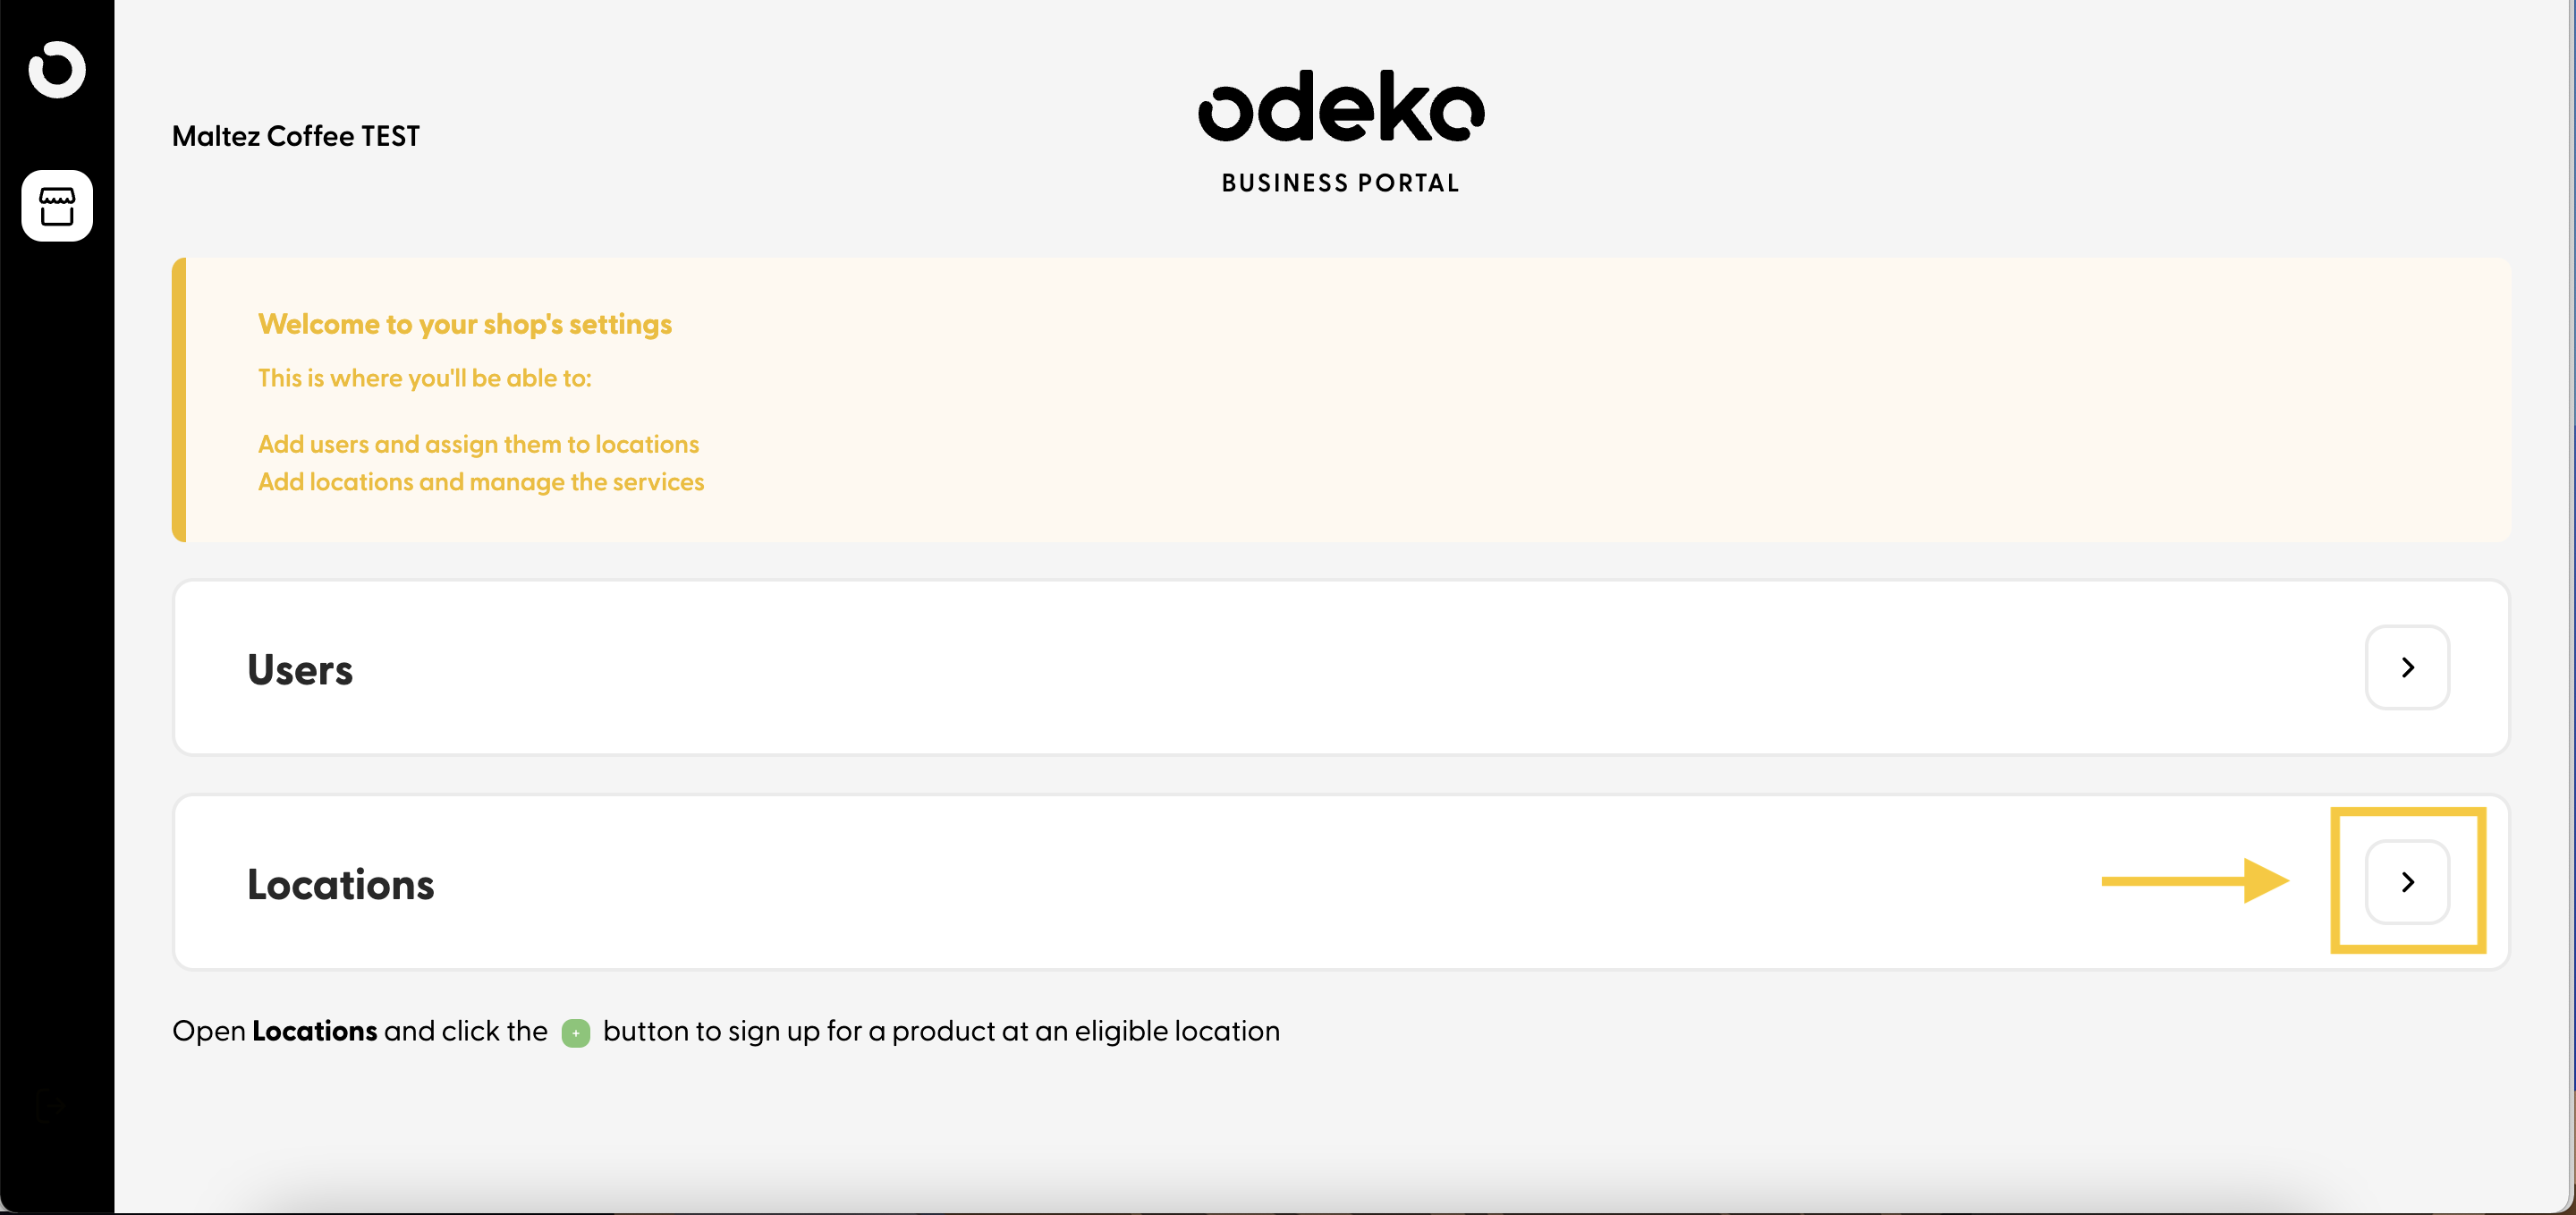
You will now see two boxes in the center of your screen; one for Users, and one for Locations. For this task, we will be selecting Locations by clicking the arrow icon on the far-right of that box.
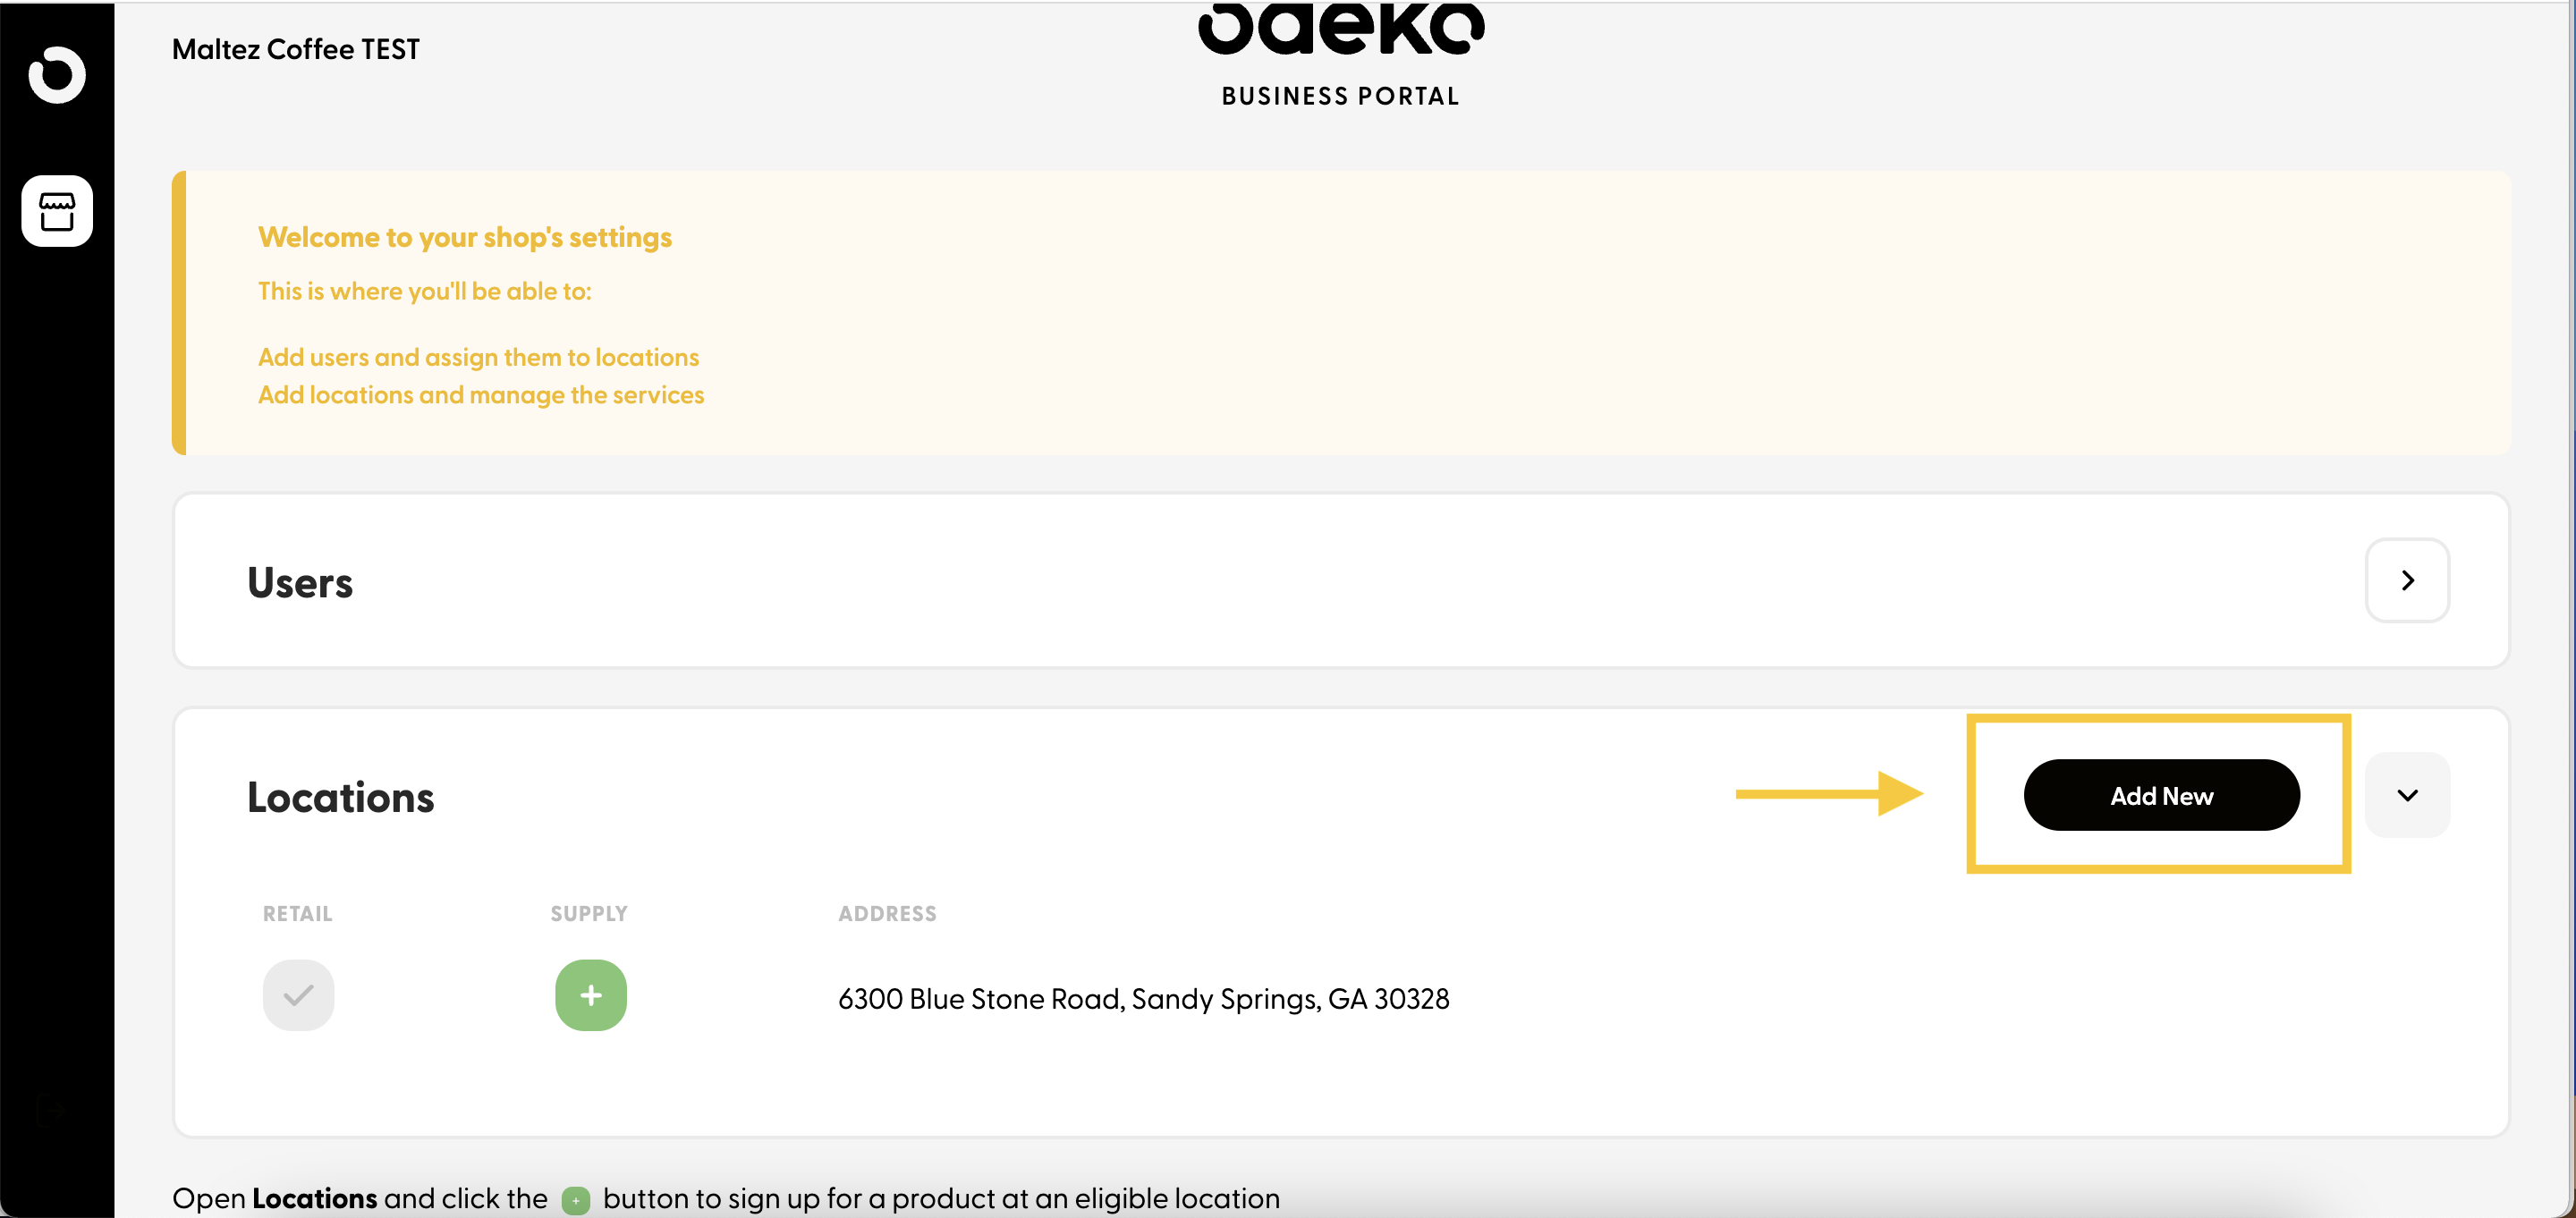
After clicking the arrow to expand the Locations sub-menu, you will be presented with an icon to Add New - let's click here.
You must have an Owner profile to select this button; if you do not see this icon, please contact your Account Manager or our Customer Support Team to make sure your permission levels allow this action.
Step 3
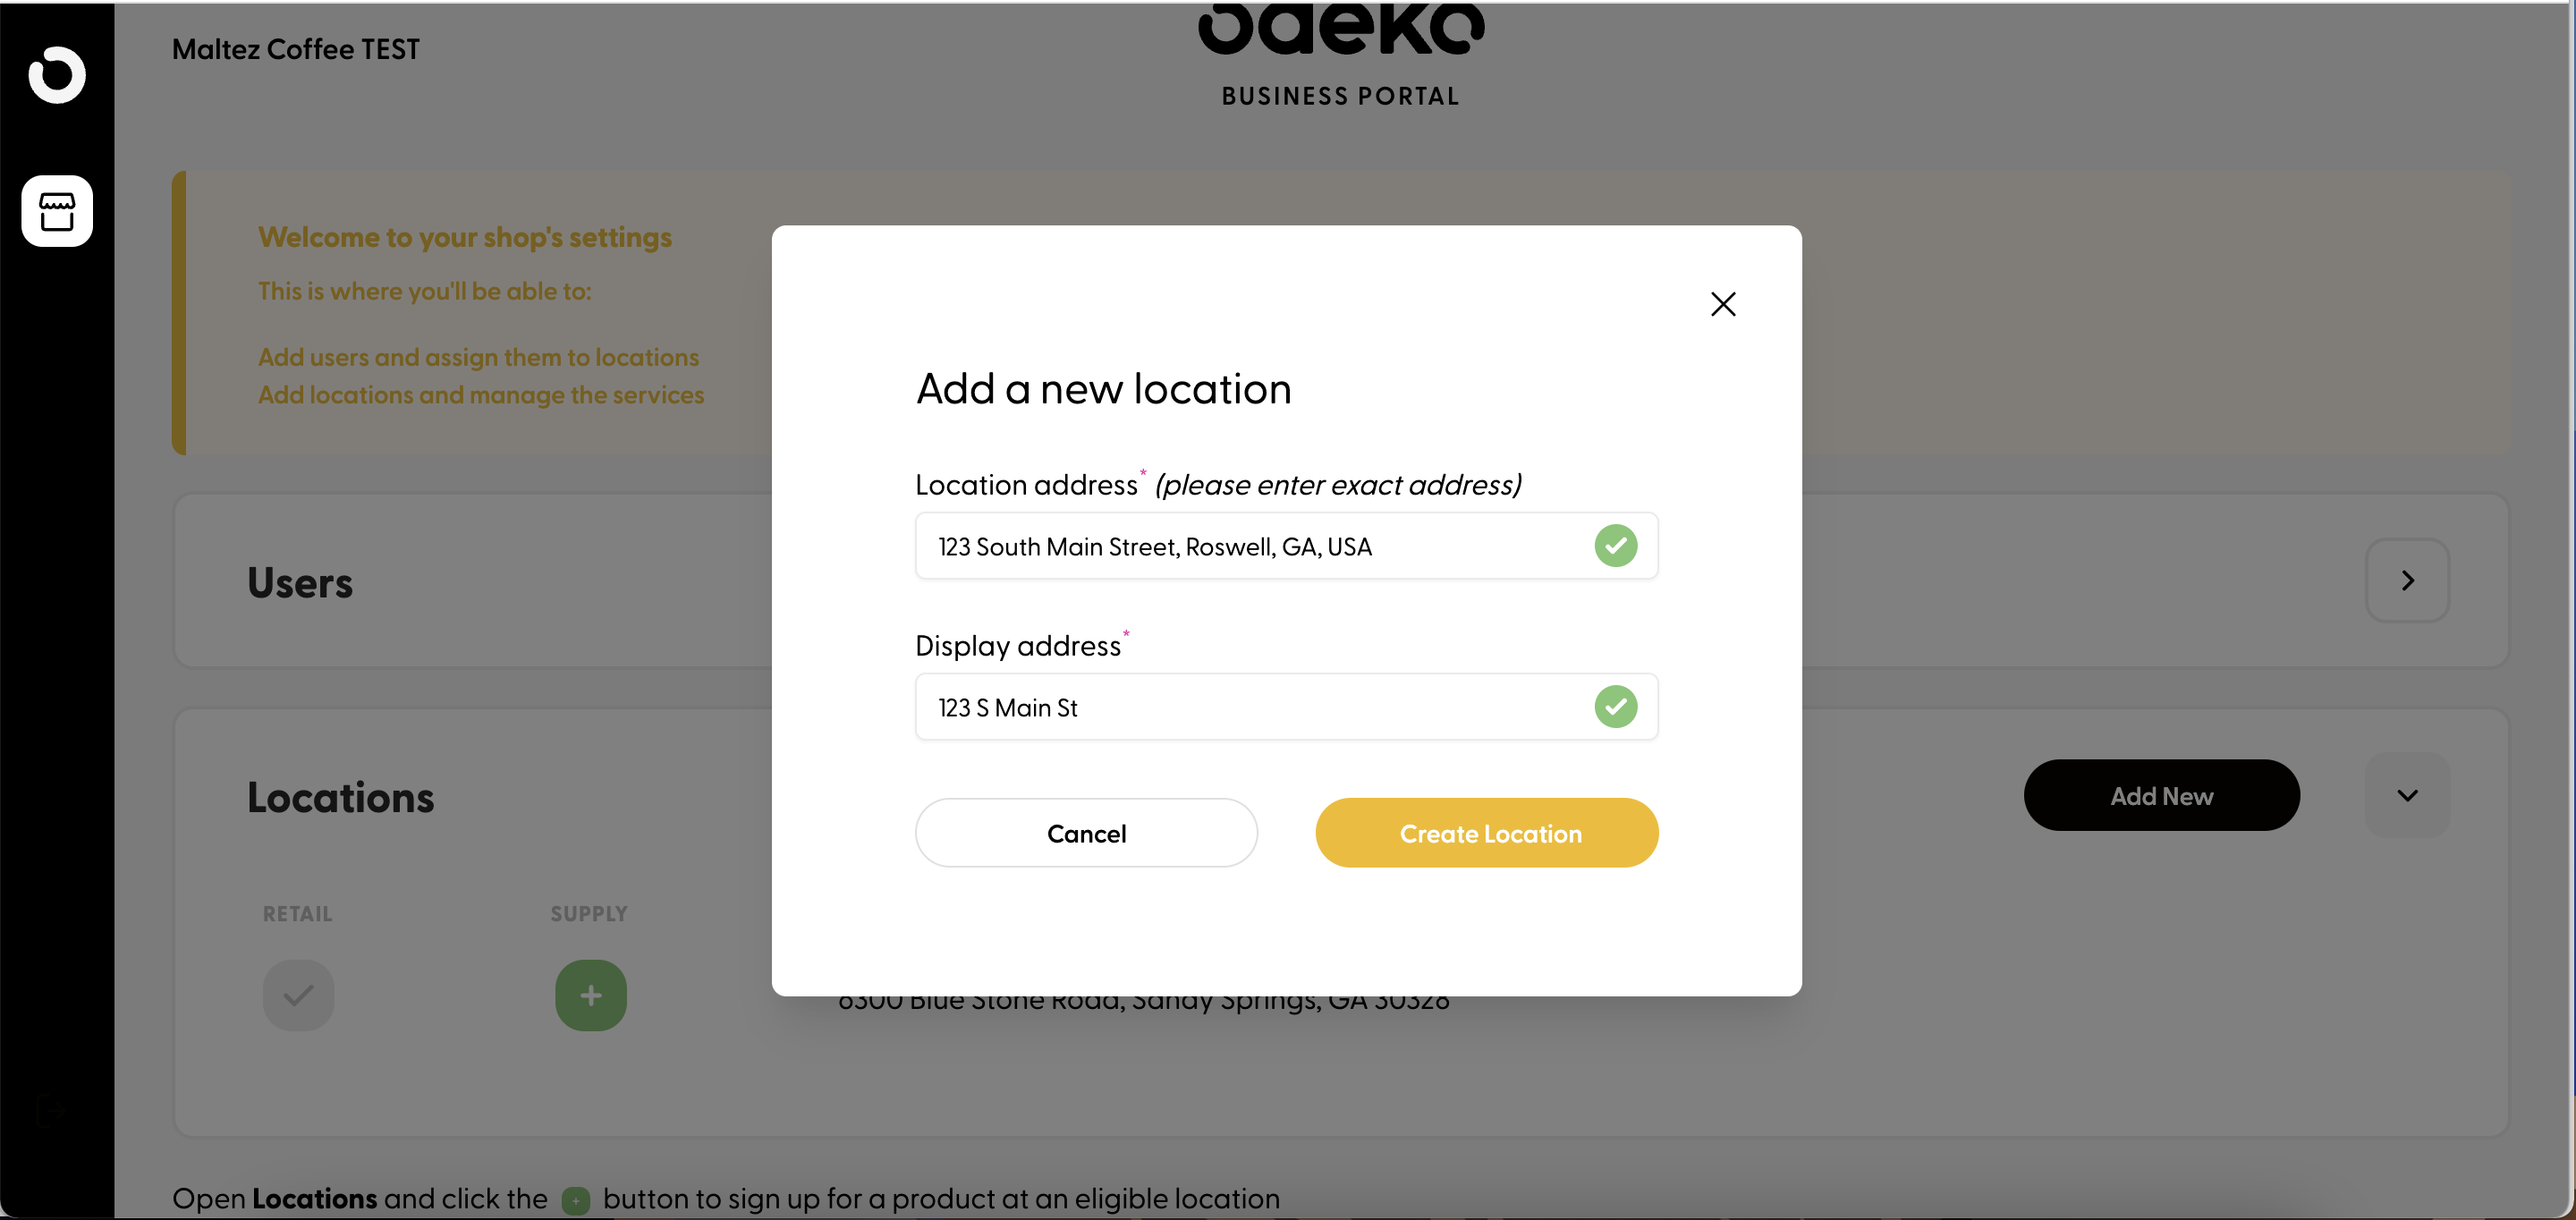
In the Location Address field, enter your mailing address and select its match from the drop-down list that appears below.
This will verify your address in Google Maps, therefore allowing us to place your location on our maps for delivery.
Next, enter a Display Address that your employees will see internally when navigating the platform.
This does not need to be exact! For example, if you are at a major intersection or are a pop-up in a park, feel free to make the intersection or that park your address.
Step 4
Finally, after your location has been created it is time to activate it for Supply.
Simply click the same arrow icon next to Locations to expand the sub-menu again, and you will see a green box to the left for Supply - select to activate your new location.
If prompted to "Schedule a Call," please contact your Account Manager to ensure we have all the necessary information to activate your new location.
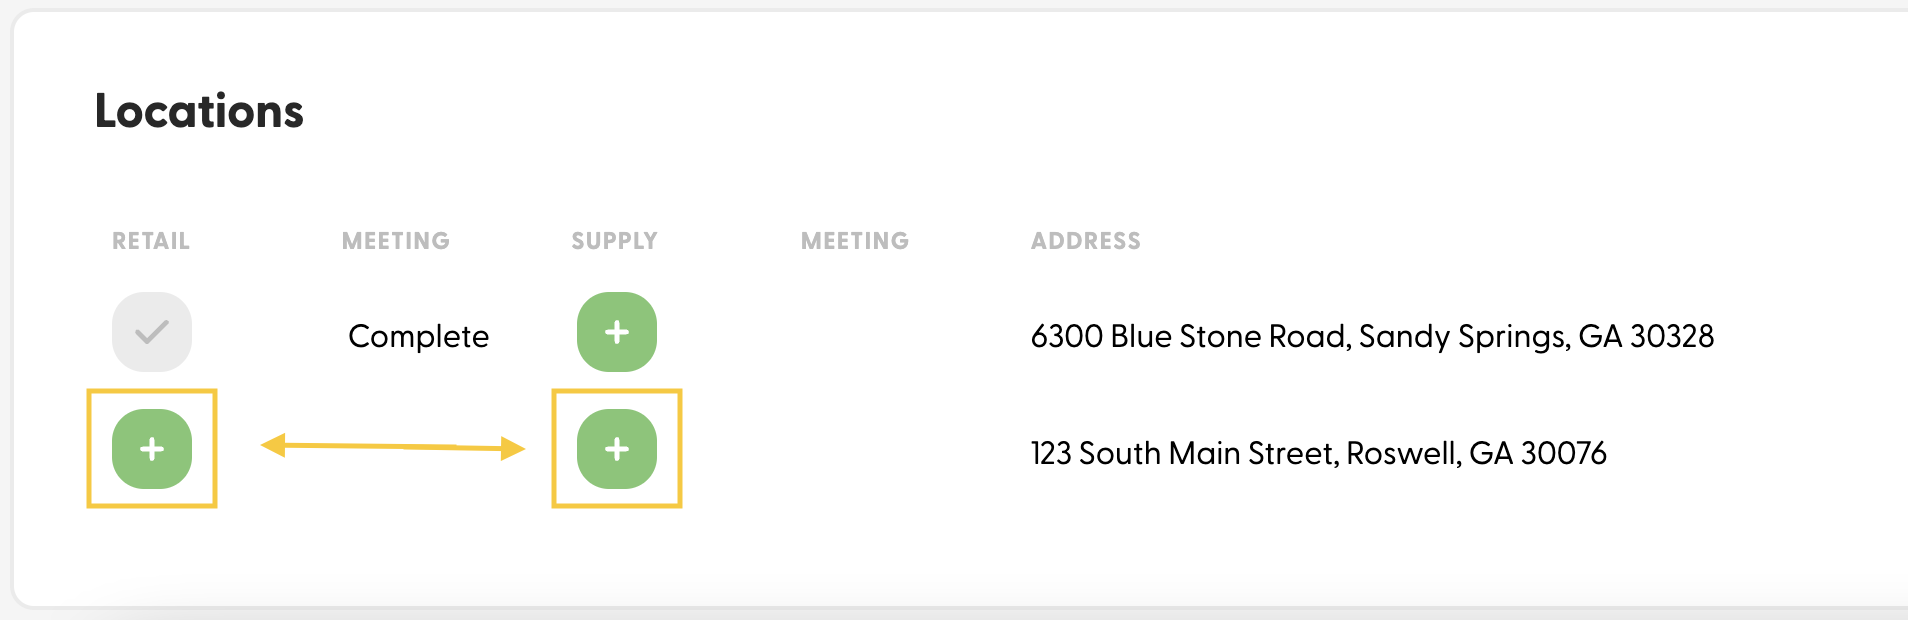
Once activated, your green icon should become gray and indicate a checkmark.
Congratulations, you have successfully added a new location to your Odeko account! Now onto tuning up your catalog, adding new users, and creating your first orders.